Photo Realistic Rendering for Mattress Brands Explained
Your best hybrid is sitting on the product page with a flat catalog shot, no view of the foam layers inside, and a return note that says it didn't look like the picture. The shopper couldn't lie on it, couldn't press the edge, and couldn't see the quilt up close, so she guessed. Photo realistic rendering is how you stop asking her to guess, provided the image tells the truth about construction instead of promising a feel it can't prove.
What Photo Realistic Rendering Means for Mattress Products
Say a shopper opens your page at night, zooms into the ticking, and tries to work out whether that top panel is a plush quilt or a tight stretch knit. She can't run a hand over the gusset or sit on the edge to test support. Your image has to do that showroom work for her.
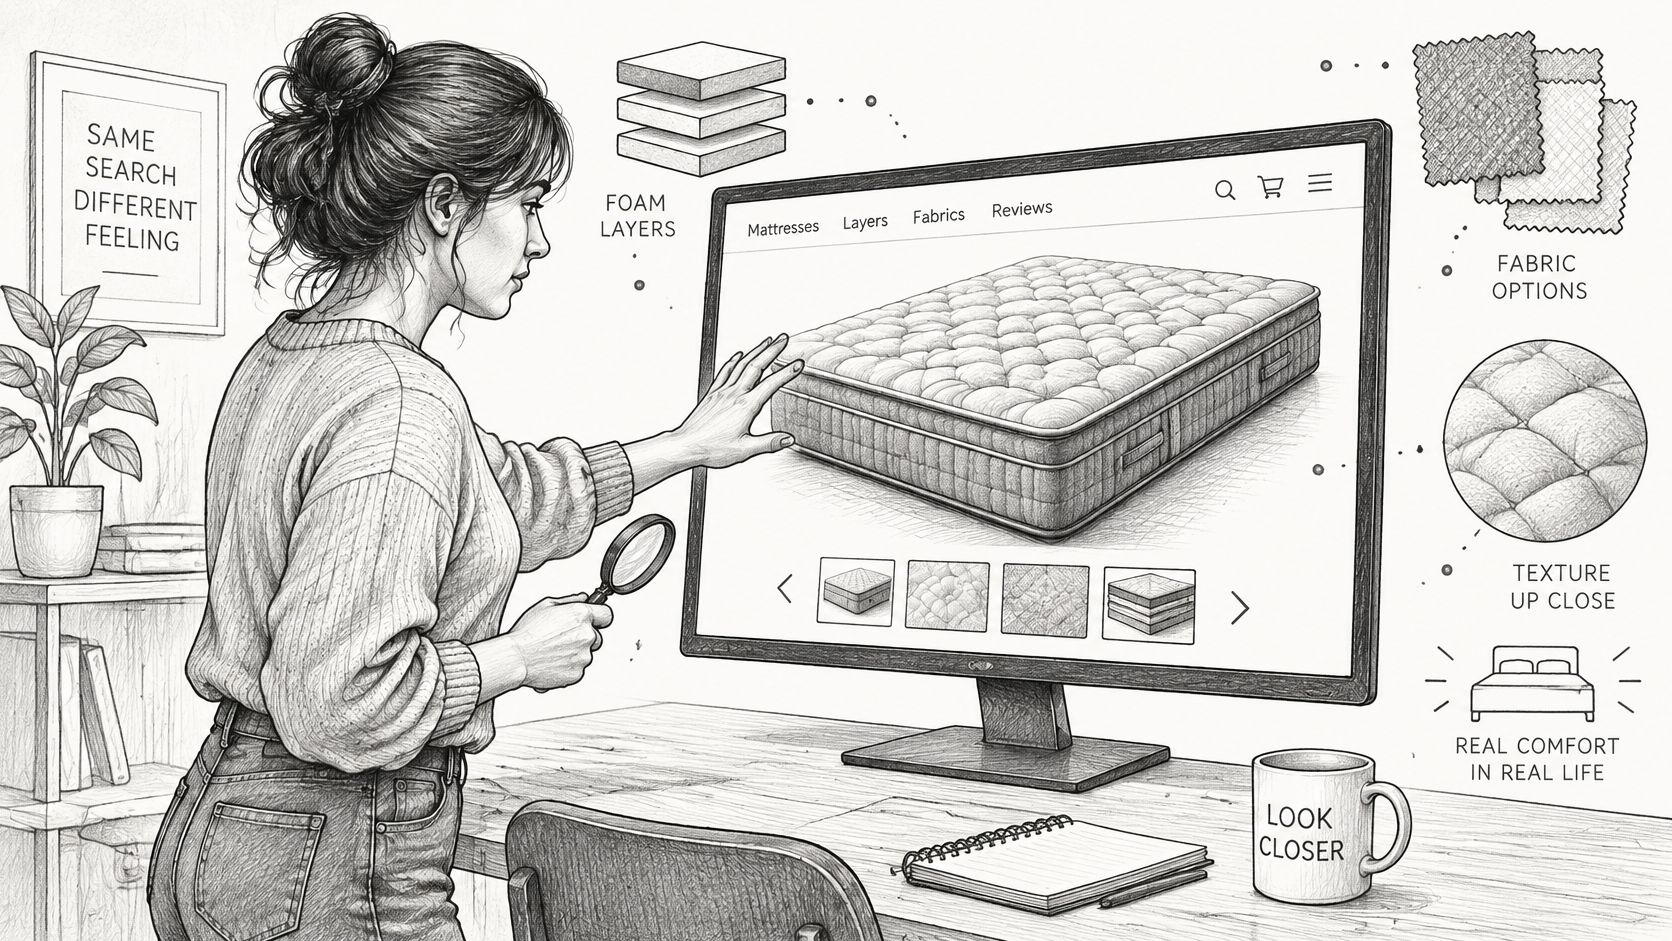
Photo realistic rendering is a computer generated image built to simulate how light hits real geometry, materials, and shadows closely enough to pass for a photograph. Think of it this way. A photograph captures one physical floor model under one set of lights, on one day. A render is built from the mattress's construction data, so that same model can be lit from another angle, cut open to show foam layers, or placed in a bedroom without shipping a unit anywhere.
Why Physically Based Materials Matter
The engine behind convincing work is physically based rendering, or PBR. A comparison of physically based and photo realistic rendering describes PBR as following the physical laws of light behaviour, while also requiring more computer memory and longer rendering times than less constrained approaches.
That trade off shows up directly on a mattress. Knitted covers, quilting, foam, latex, wood, metal, and fabric each absorb and reflect light differently. If the material values are right, a quilted cover reads soft and matte, a latex layer doesn't shine like plastic, and a dark border fabric stays the same colour in a silhouette and in a room scene. If they're guessed, the whole bed looks synthetic even when the model shape is perfect.
Practical rule: Approve materials against a physical swatch under neutral light, not against how good they look on a calibrated studio monitor.
One Master, Lighter Versions for the Web
Because higher realism costs processing time, you don't publish the master file everywhere. You keep one high sample master for hero images, print, and sales decks. Then you export lighter, faster loading versions for product pages, feeds, and interactive views.
That discipline matters for hybrid mattresses especially. Coils, transition foam, comfort layers, and edge support all need to stay consistent across every view. Change a layer thickness in the master, and every downstream asset should inherit the correction.
Which Render Type Fits Each Product Job
Start with the job, not the software. Each render type answers a different shopper question, and buying all five for every SKU isn't always the right first spend.
Render type | What it shows | Best job | Where it usually runs |
|---|---|---|---|
Digibun | Layered internal view of ticking, quilt, foam layers and support core | Explaining construction and zoned support | Product page, sales deck, showroom tablet |
Silhouette | Clean isolated product on a neutral background | Standardized catalog and marketplace consistency | Retailer catalog, marketplace listing, product feed |
Room Scene | Styled bedroom with realistic light, textiles and décor | Helping shoppers picture the bed in context | Brand site lead image, paid social, email |
Hero close-up | Edge, stitching, handle or quilting pattern at high detail | Proving finish quality on zoom | Product page gallery, print collateral |
Interactive 360 or motion view | Rotating product or compression and motion demonstration | Showing scale and behaviour across angles | Product page module, retail touchscreen |
How to Read the Table on Monday
I'd start every SKU with a silhouette. It's the cheapest asset to standardize across your site, retailer feeds, and marketplaces, and it removes the mismatched angles and lighting that make a line look disorganized. If your current catalog mixes phone photos, old vendor shots, and one good studio image, fix that baseline first.
Add a Digibun when construction drives the decision. That's zoned foam, a hybrid coil and foam build, reinforced edges, or a cooling layer you charge more for. Shoppers can't see any of that from the outside, and RSAs can't cut open a floor model to show it.
Use hero close-ups where zoom behaviour is high. Stitching, handles, piping, and quilt pattern are finish cues. If those details turn muddy at full zoom, shoppers read it as low quality, even if the physical tailoring is clean.
For a useful overview of how these formats differ in style and purpose, see this guide to the styles of rendering. It'll help your team use the same language when briefing a studio.
Baseline for every PDP: silhouette plus one internal view
Add when you sell feel by construction: Digibun with labelled layers
Add when context sells the room: room scene, tested by channel
Add when staff keep answering the same question: 360 or motion view on a touchscreen
Every product page should carry at least one image that shows what the customer can't see from the outside.
One master model can produce all five types. Your cost decision is really about how many variants, angles, and colourways you need, not how many physical units you photograph.
How a Photo Realistic Mattress Render Gets Built
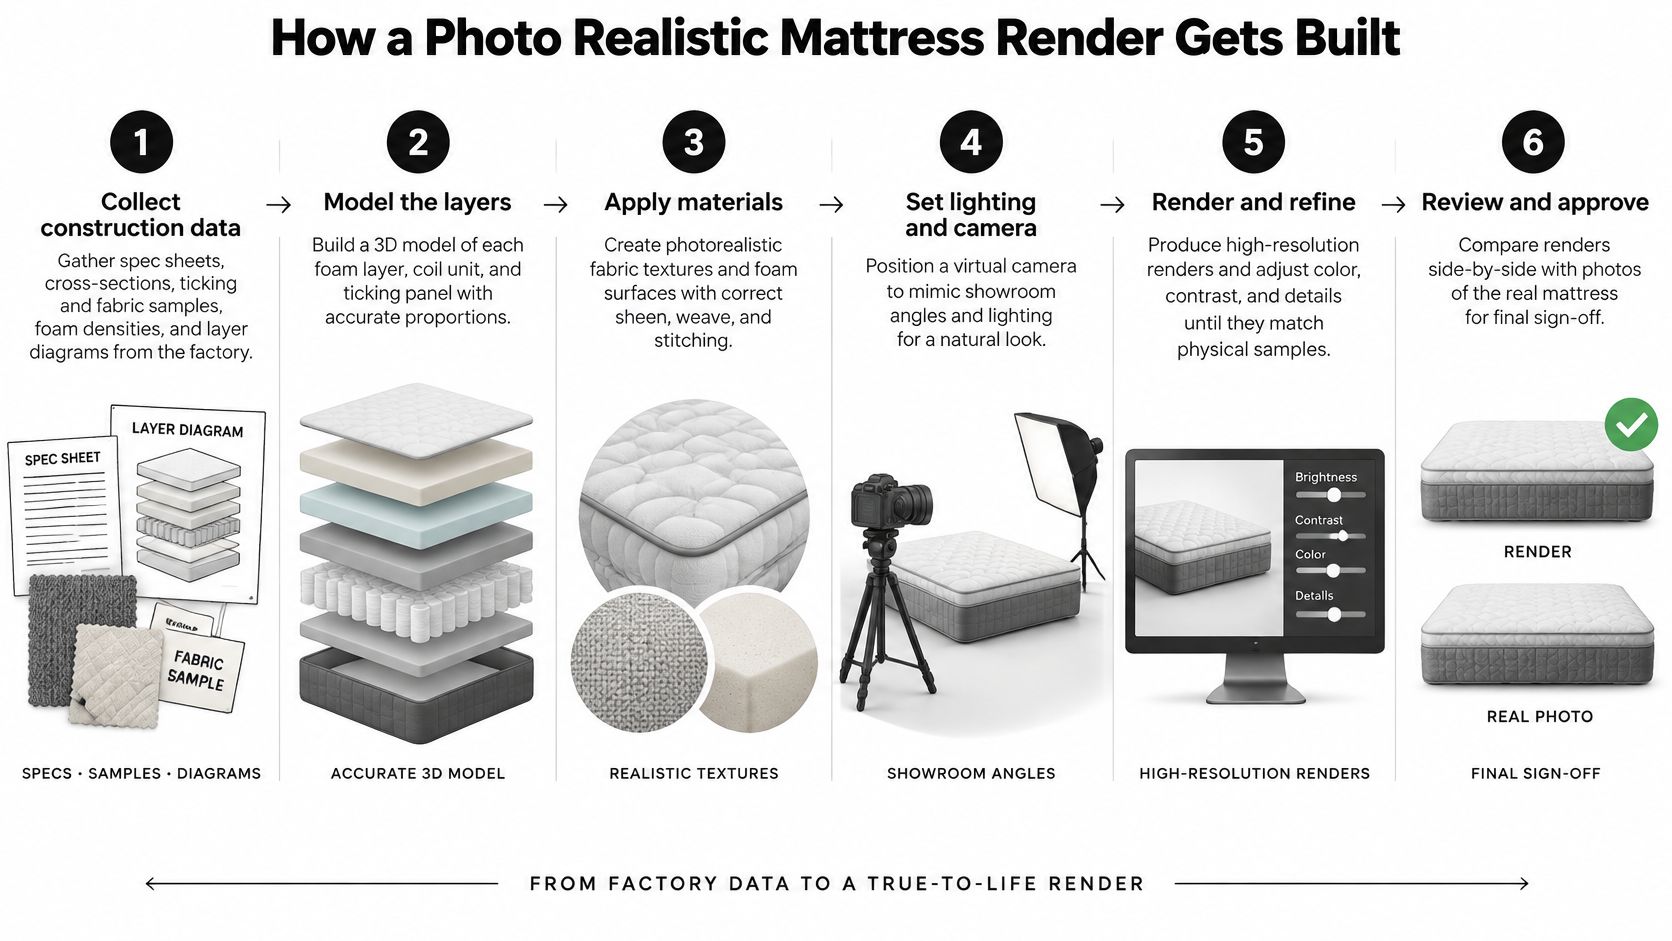
A good render is a controlled build. It starts at the factory spec sheet and ends with a check against that same sheet, and every creative choice in between answers to the physical product.
The Seven Steps to Brief and Review
Collect construction data. Gather spec sheets, cross sections, ticking and fabric samples, foam types, and layer thickness. Every later step inherits these inputs, so a wrong layer order here repeats everywhere.
Model geometry to real dimensions. Build the quilting pattern, gusset width, handle placement, border, and edge height to the actual product. A border modelled too tall makes the mattress look more substantial than the unit that arrives in the box.
Assign PBR materials. Set roughness, sheen, and surface maps so knit, damask, and foam respond to light the way they do on your floor. Tuning by eye alone is how a budget knit ends up reading as premium damask.
Light the scene. Use a soft key, fill, and bounce light that mirrors a showroom or bedroom. Product-only and room views should feel like they belong to the same brand.
Render a clean master. Produce a high-sample version for hero and print use. This is your source of truth.
Produce a denoised preview. Build the web and interactive version, then check that weave, piping, and edge detail survived.
Review against the spec sheet. Compare layer count, quilt pattern, handles, and cover colour to the document, not to the last image somebody approved.
Steps 1 and 7 carry the most weight. I treat step 7 as a sign-off gate rather than a courtesy glance, because wrong input data plus great lighting produces a more believable error, and a more believable error is what becomes a return.
Keep one limit in view while you review. A render can show that a layer exists and exactly where it sits. It cannot prove how the mattress feels under a sleeper. The closer an image gets to implying firmness or temperature, the more it owes the physical product.
Why Some Scenes Render Slowly
Real-time previews organize geometry in a Bounding Volume Hierarchy, or BVH, so each ray tests fewer triangles, and they often pair hardware ray tracing with denoising to reconstruct a stable image from fewer sampled rays. That combination earns its keep on soft shadows, reflections, and indirect illumination, which are exactly the effects that make fabric read as fabric.
The speed has a cost. Aggressive denoising can erase subtle weave, stitching, and highlight detail on close-up fabric. Validate the clean master and the denoised preview side by side before you approve either one.
You can also control cost inside the scene itself. Remove hidden detail the camera never sees, instance repeated quilting or coil components instead of modelling each one separately, and limit reflection depth to what the shot needs. Benchmark the actual hero angles you plan to publish, because average scene performance hides the one expensive angle with layered materials, several area lights, and reflective bedside accessories.
Accuracy under a render budget is a shared problem across visualization work. A tool for ai generated backyard design has to get scale and materials right before lighting can make a patio believable, and the same rule governs a mattress build. Get the construction data right and the render works as a product-accuracy tool. Get it wrong and the image promises a feel the mattress cannot deliver, which the customer answers with a return.
The Business Case on Returns, Conversion and Cost
Returns are where pretty imagery gets expensive. If loft, sheen, colour, or edge height on screen doesn't match what comes out of the box, the shopper doesn't blame the render. She sends the mattress back.
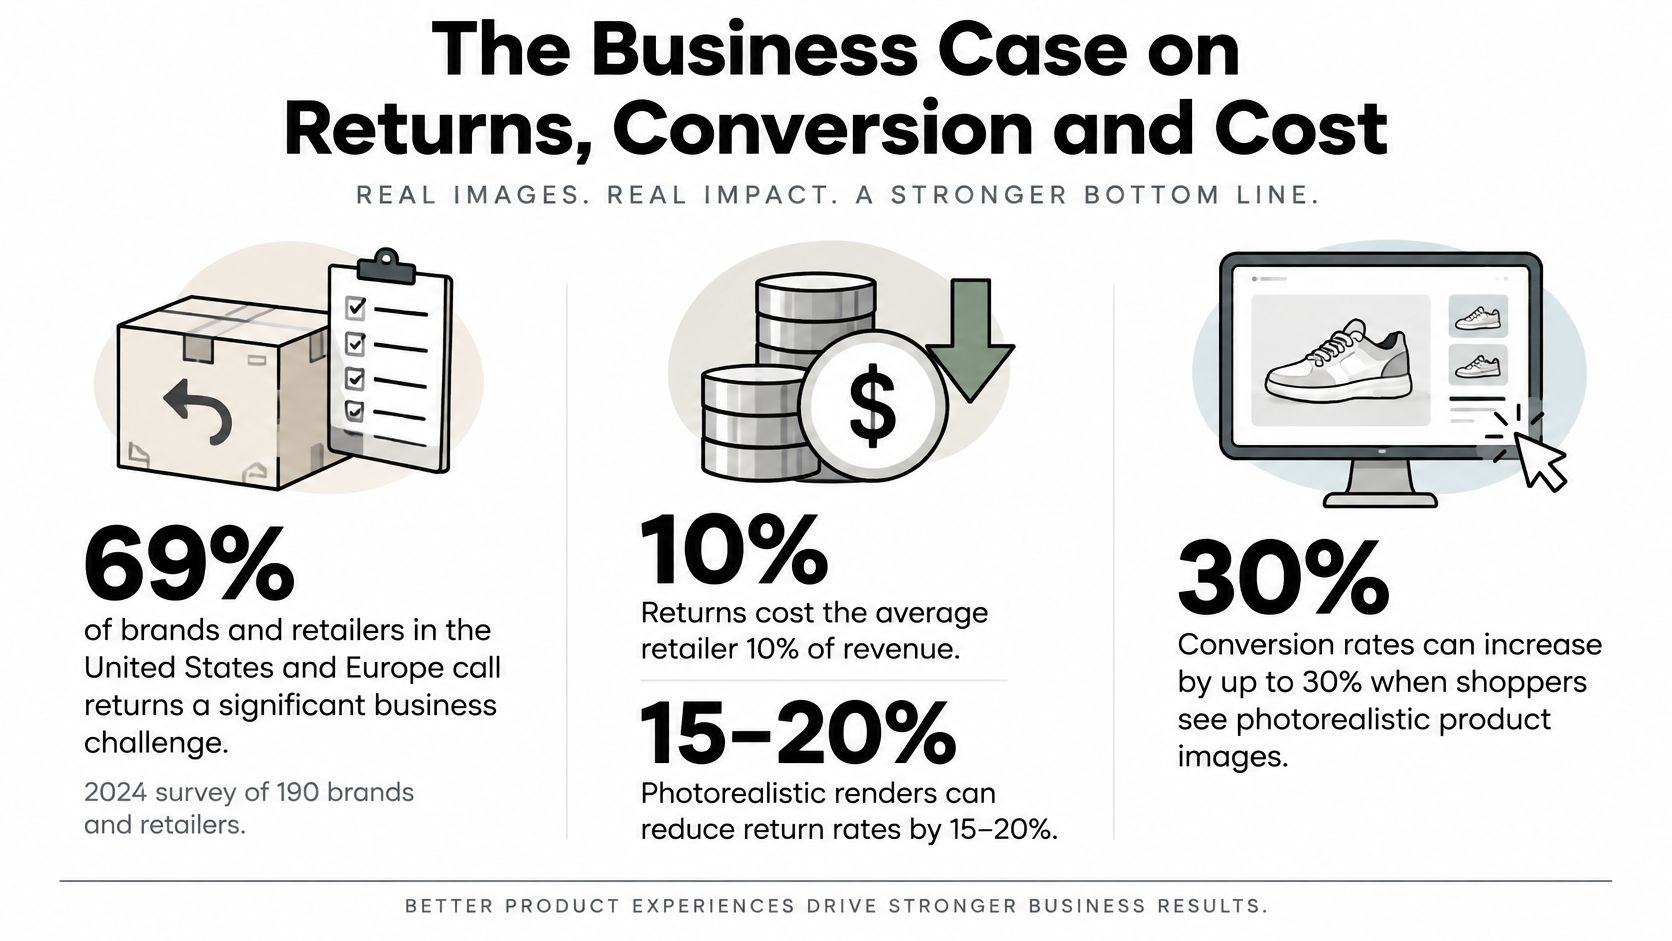
A 2024 survey of 190 brands and retailers in the United States and Europe found that 69% considered product returns a significant business challenge. Across those companies, approximately 20% of online purchases were returned, and products not matching their online images accounted for 11% of returns, including inaccurate size, colour, material, or functionality.
What Brands in That Survey Planned to Do
The same survey found 63% planned to improve product-image quality to reduce returns, while 68% planned to invest in computer-generated imagery. Among companies already using CGI, 60% reported increased sales conversion, alongside lower costs and fewer returns.
Read those numbers carefully. They cover brands and retailers broadly, not mattress-only results. They support investing in accuracy, but they don't guarantee your return rate will move by a set amount. Your reason codes will tell you if image mismatch is your problem.
Photography Cost Versus Render Cost
A photo shoot repeats every time you change a cover, add a size, revise a layer, or launch a private label variant. You ship units, book a set, style a room, and reshoot. A render revises from the same master model, so a ticking change or a new colourway doesn't start the process again.
Before you quote either route, run this comparison for one SKU. This breakdown of 3D rendering cost gives you a starting frame for that conversation.
Returns by reason code: Separate image mismatch from comfort, damage, and delivery issues
PDP conversion: Measure before and after new imagery, by SKU
Reshoots per year: Count how often construction or cover changes force new photography
True shoot cost: Product, freight, set, styling, photographer, retouching, and staff time
Render variant cost: Master build plus each additional angle, scene, and colourway
If you can't name your top image related return reason today, don't project savings yet. Measure first, then spend.
Where Room Scenes Convert and Where They Do Not
A styled bedroom can help a shopper picture the bed at home. It can also do nothing at all. The channel often decides which outcome you get.
A 2024 ACM study of contextual product imagery for home-decor products found that on one website that encouraged contextual imagery as the lead image, products using contextual visuals converted at 13.16% versus 2.46% for non-contextual images, a 435% increase that was statistically significant at p < .001. On another website, contextual and non-contextual imagery produced 4.21% and 4.55%, respectively, with no statistically significant difference.
That's the lesson for mattress brands. Don't buy room scenes because they worked somewhere else. Test them where placement, search display, and gallery rules give them a chance.
Channel | Lead image | Supporting image | First test to run |
|---|---|---|---|
Brand website product page | Room scene | Digibun and silhouette | Room scene lead versus silhouette lead |
Marketplace listing | Silhouette | Room scene in gallery | Confirm the platform's lead-image rules before testing |
Retailer catalog or feed | Silhouette | Hero close-up | Consistency check across all SKUs |
Paid social | Room scene | Hero close-up | Thumbnail crop and first-frame test |
Showroom touchscreen | Interactive 360 or motion view | Digibun | Staff feedback on the most-asked question |
Run the Test Cleanly
Keep everything identical except the lead image. Same price, same copy, same gallery order after position one, same traffic source mix. Run it long enough to cover a full buying cycle, because mattress shoppers don't always convert on the first visit.
Measure conversion rate, not just click through. A beautiful bedroom can earn clicks from people who like the décor and never intended to buy that firmness. This comparison of product photography and lifestyle imagery is useful when you're deciding what your lead image needs to prove first.
One warning matters more than the test design. The room scene still has to match real proportions, cover colour, and firmness cues. If you style a low profile hybrid to look like a tall plush pillow top, you may win the click and create the return.
Where Renders Mislead and How to Disclose Them
A render can show loft, contour, colour, and where each layer sits. It cannot show pressure relief, temperature regulation, motion isolation, odour, durability, or body support. Those are performance claims. An image that implies them without proof is a misrepresentation, whatever label sits under it.
Say your hero image shows a body sinking deep into a comfort layer. A side sleeper reads that as pressure relief. If the actual foam feels firm and flat, she won't file it under "illustrative." She'll file a return.
What Disclosure Research Suggests
Evidence on disclosure is mixed, which is why a blanket rule doesn't work. A 2025 study of 199 U.S. adults found consumers generally did not penalize AI imagery across technology, food, apparel, and cosmetics, although disclosed AI imagery produced a statistically significant 0.499-point decline in apparel purchase intent (p = .015). Other 2025 research points the same direction: when image origin goes undisclosed, attitudes barely differ between AI and human-made visuals, but once origin is disclosed, attitudes toward human-made images tend to improve. Read that as a role-based question, not a yes-or-no one.
For bedding, tie disclosure to the image's job and the cost if a shopper misreads it.
Explanatory construction view: Label it as rendered, name each layer, and link to the spec sheet.
Lifestyle room scene: Use stronger disclosure when the scene implies a real bedroom, real texture, or a customer experience.
Performance simulation: Mark compression, motion, or temperature visuals as simulations, and tie any firmness or support claim to lab-tested data on the page.
Standard silhouette: Keep proportions and colour exact, and add no loft or sheen the product doesn't have.
The riskiest row is the third. A silhouette that's slightly wrong annoys a shopper. A compression animation that's slightly wrong sells a feel the mattress can't deliver, and that gap comes back as a return reason.
Other visual industries are working through the same line. The thinking behind AI staging disclosure rules for agents is a useful parallel, because it also separates helpful visualization from imagery that implies a real space.
Don't hide renders, and don't label them without substance. Pair the visual with dimensions, layer names, and a plain note on what's simulated. If imagery accuracy is where your returns start, this guide on how to reduce product returns connects the image problem to the rest of the PDP.
Disclosure test: If a detail in the image could change a buying decision, the shopper should be able to verify it somewhere other than the image.
Audit Your Mattress Imagery Before Your Next Launch
The goal this week is simple: sort your live images into three piles. Accurate ones stay. Vague ones get queued for revision. Anything that promises a feel the mattress can't deliver gets pulled or relabeled before it generates returns.
A One Week Audit for Your Top Five SKUs
Pull every live image. Include PDP galleries, marketplace listings, retailer feeds, and paid social assets.
Check against the current spec sheet. Verify layer count, quilting pattern, handle placement, edge height, gusset, and cover colour. A render only earns its place on the page when it matches the build exactly.
Tag each image by role. Construction, silhouette, lifestyle, close up, or interactive. Gaps become obvious quickly.
Flag implied performance. Mark any image that suggests softness, cooling, support, or motion control without supporting data on the page. Loft rendered higher than the spec, or sheen the cover fabric doesn't have, is where accuracy slips into a return reason.
Decide disclosure by role. Apply the framework above and write the label copy before launch, not after a complaint.
Track returns by reason code. Watch image mismatch separately for the next cycle so your next spend uses your own numbers.
If half your top sellers have no internal view, that's your first brief. If room scenes lead every channel but you've never tested a silhouette lead on your own site, that's your first test. If a cover changed six months ago and the gallery still shows the old ticking, fix that before you buy anything new.
Bedhead Marketing focuses on the mattress and bedding industry, and we list website design and 3D visualization among our services for mattress and bedding brands. We also offer digital marketing, ecommerce strategy, creative asset creation, product storytelling, and high-end visual content, so a render comes with the page and campaign work that makes it convert.
If you're evaluating your current product imagery before a launch, we can audit your top SKUs, build accurate Digibuns, Silhouettes, and Room Scenes from your construction data, and align them with your product pages so they reduce guesswork instead of creating returns. Start the conversation at BEDHEAD and bring a spec sheet for one mattress you wish shoppers understood better.